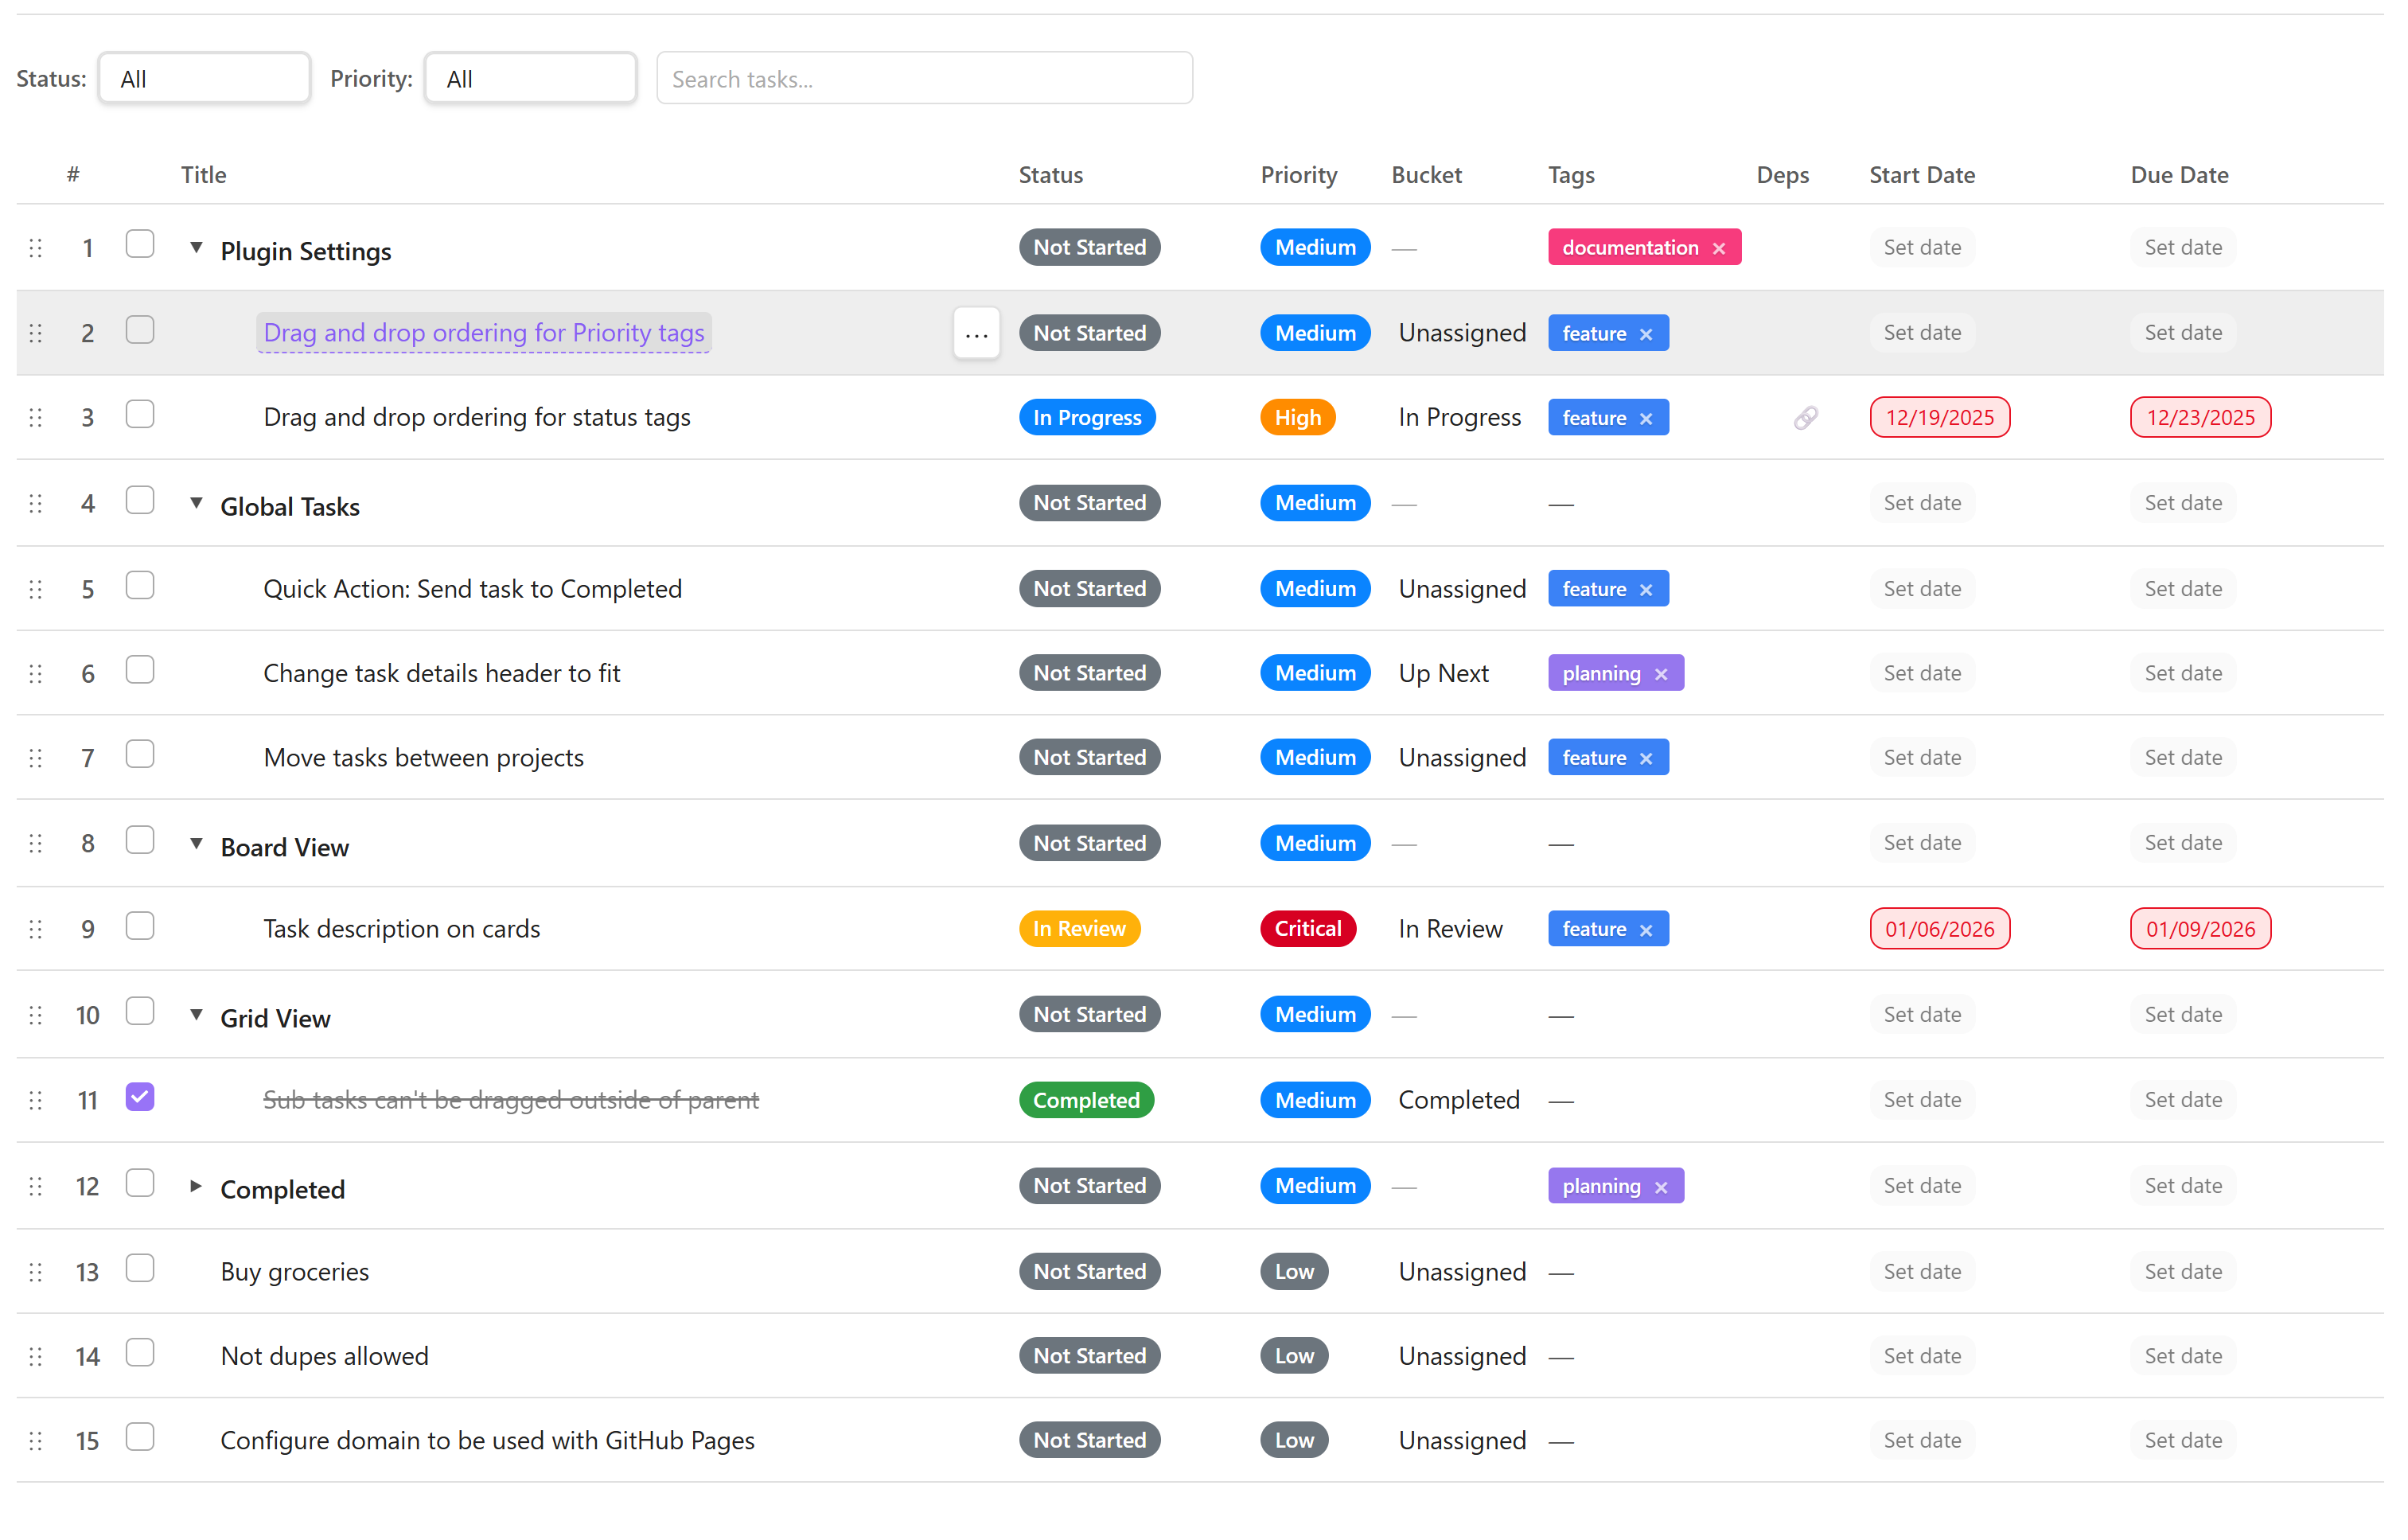
Grid View
The Grid View is a powerful, spreadsheet-like interface for managing tasks. It supports hierarchical organization, inline editing, multi-column layouts, filtering, sorting, and drag-and-drop — giving you full control over your project data without ever leaving the table.
Overview
- Hierarchical Organization — tasks and subtasks displayed in a collapsible tree structure.
- Multiple Columns — status, priority, due date, tags, bucket, and more.
- Inline Editing — click any cell to edit its value directly in the grid.
- Filtering & Sorting — narrow down tasks by any column or keyword.
- Drag-and-Drop — reorder tasks or nest them as subtasks by dragging rows.
Navigation
Header Bar
The header bar sits at the top of the Grid View and provides quick access to common actions:
- Project Selector — switch between projects via the dropdown.
- View Buttons — toggle between Grid, Board, Timeline, and other views.
- + Add Task — create a new top-level task at the bottom of the list.
- Filters — open the filter bar to narrow tasks by status, priority, tag, or keyword.
Column Customization
Every column in the grid can be tailored to your workflow:
- Sort — click a column header to sort ascending/descending.
- Resize — drag the right edge of a column header to adjust width.
- Reorder — drag a column header to a new position.
- Show / Hide — click the "Columns" button in the header to toggle column visibility.
Tip: Hide columns you rarely use to keep the grid compact on smaller screens.
Task Rows
Each row represents a single task. Rows support the following interactions:
- Expand / Collapse — click the arrow icon on parent tasks to show or hide subtasks.
- Checkbox — mark a task complete directly from the grid.
- Editable Cells — click any cell (title, status, priority, dates, etc.) to modify its value inline.
- Action Buttons — hover over a row to reveal quick-action icons (delete, open details, etc.).
Creating Tasks
Top-Level Tasks
- Click the "+ Add Task" button in the header bar, or
- Right-click any row and choose "Add new task above" from the context menu.
- Type a title and press Enter to confirm.
Subtasks
- Click the "…" menu on the target task and select "Make subtask", or
- Drag a task row and drop it onto another task to nest it as a child.
Note: Subtasks inherit the parent's project but maintain their own status, priority, and due-date fields.
Editing Tasks
Inline Editing
Click any editable cell to activate it. Change the value, then press Enter or click outside the cell to save. Changes are written back to the Markdown file immediately.
Task Details Panel
For a more comprehensive editor, right-click a row and select "Open details" to open the Task Details Panel. The panel provides access to every field including description, dependencies, links, and checklists.
Data Storage
All task data is stored as structured Markdown and synced in real time. For a detailed breakdown of how tasks are represented on disk, see the Data Structure reference.
Important: Edits made in the Grid View are reflected instantly in the Markdown source. Avoid editing the same file manually while the grid is open to prevent conflicts.
Support & Related Pages
Explore more views and features: