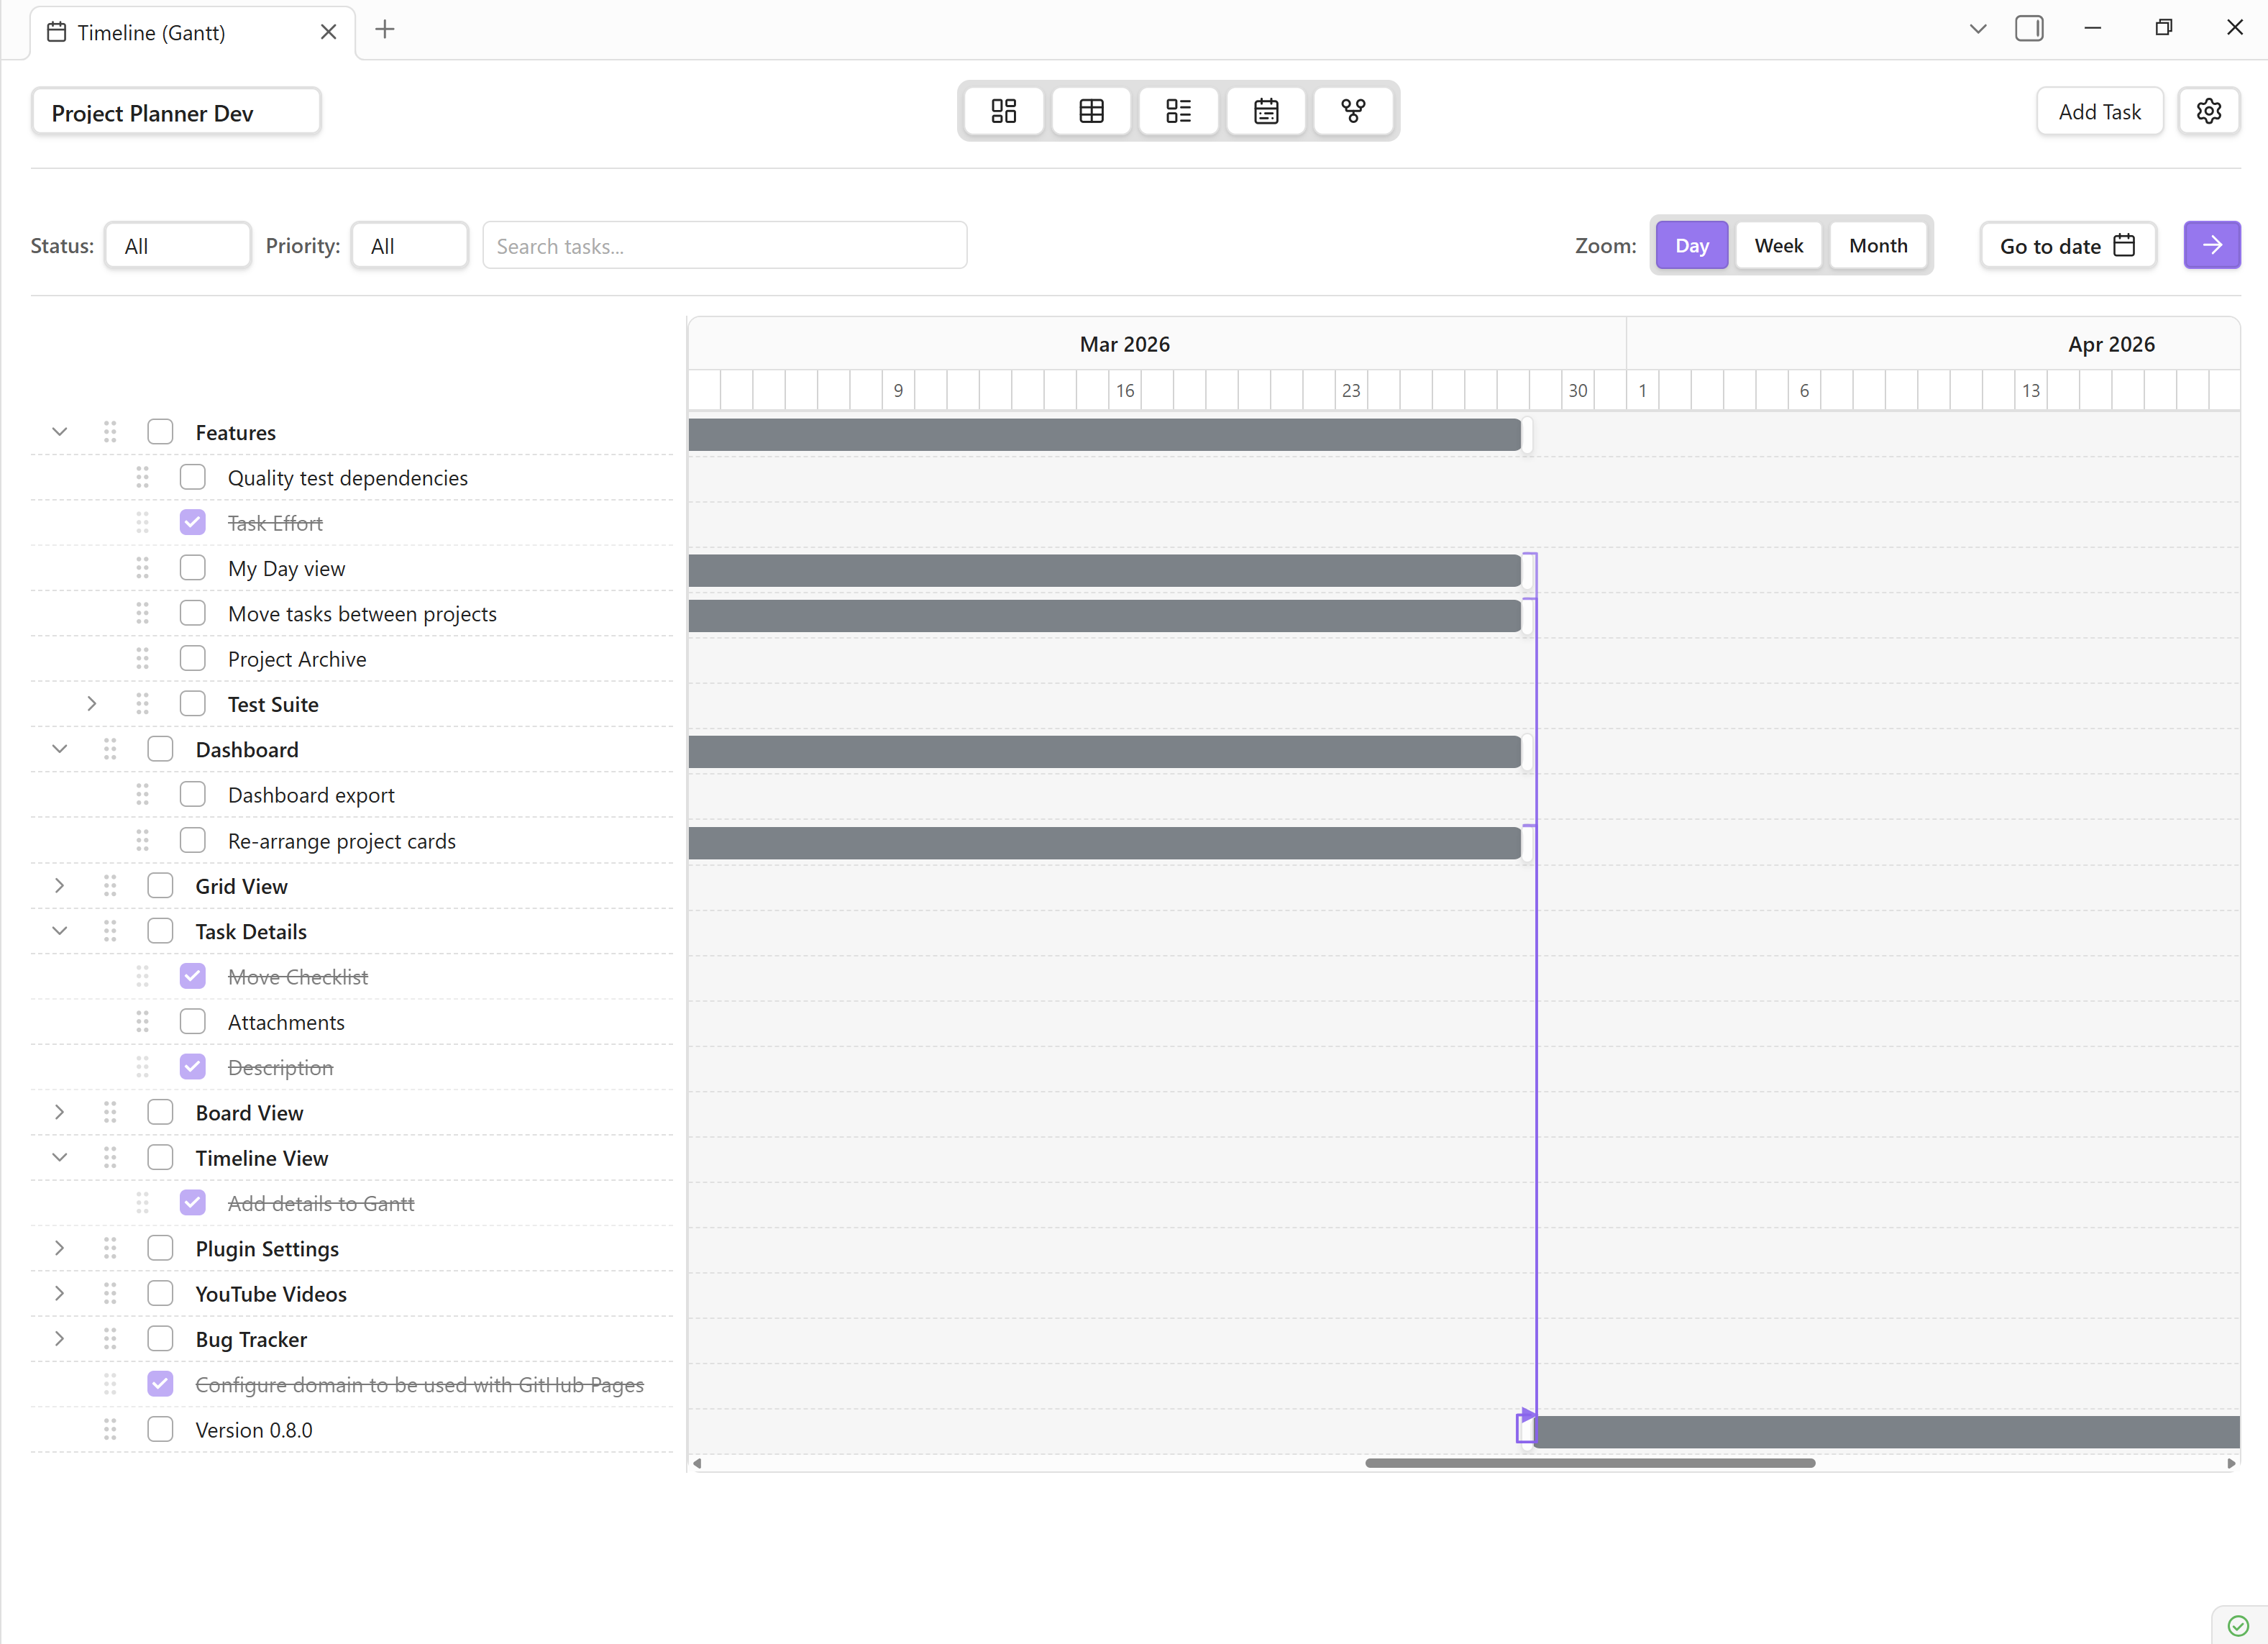
Timeline View (Gantt Chart)
The Timeline View renders your tasks as horizontal bars on a time axis, giving you a visual Gantt-chart perspective of your project schedule. Drag, resize, and rearrange tasks to plan dates interactively.
Overview
- Hierarchical Display — parent tasks and subtasks are shown in a collapsible tree.
- Horizontal Bars — each task spans from its start date to its due date on the timeline.
- Resizable Split-Pane — a draggable divider separates the task list from the timeline canvas.
- Collapsible Parents — expand or collapse parent tasks to focus on specific areas.
- Today Indicator — a vertical line marks the current date on the timeline.
Zoom Levels
Switch between three zoom levels to control how much of the timeline is visible at once:
- Day — each column represents a single day. Best for short sprints.
- Week — each column represents a week. Good for iteration planning.
- Month — each column represents a month. Ideal for roadmap overviews.
Tip: Use the zoom buttons in the toolbar or scroll while holding Ctrl / Cmd to zoom in and out.
Interactive Bars
Task bars on the timeline support three interaction modes:
- Move — drag the body of a bar to shift both the start and due dates.
- Resize Left — drag the left handle to change the start date.
- Resize Right — drag the right handle to change the due date.
- Click — single-click a bar to open the Task Details Panel.
Task List Panel
The left side of the split-pane contains the task list. It mirrors the hierarchical structure of the Grid View with these additional features:
- Drag Handle — reposition the divider to give more space to the list or the timeline.
- Collapse / Expand — toggle subtask visibility with the arrow icon.
- Inline Title Edit — double-click a task title to rename it in place.
- Context Menu — right-click for actions such as add subtask, promote, delete, or open details.
- Color Coding — row backgrounds reflect priority or status for quick scanning.
Smart Filtering
Narrow the timeline to exactly the tasks you need:
- Status Filter — show only active, completed, or specific statuses.
- Priority Filter — focus on critical and high-priority items.
- Search — type keywords to filter tasks by title.
Usage
Opening the Timeline
- Click the Timeline icon in the view ribbon, or
- Open the Command Palette and run "Project Planner: Open Timeline View", or
- Use the keyboard shortcut configured in your settings.
Adjusting Dates
- Move a bar — click and drag the bar body horizontally.
- Resize — grab the left or right handle and drag to change start or due date.
- Release to save. Dates are persisted immediately to the Markdown file.
Managing Hierarchy
- Make Subtask — right-click a task → "Make subtask" to nest it under the task above.
- Promote — right-click a subtask → "Promote" to move it up one level.
Reordering Tasks
Drag rows in the task list panel to reorder. The following rules apply:
- Tasks can be reordered within the same parent.
- Dropping a task onto another task nests it as a subtask.
- Dropping between tasks repositions it at that level.
Resizing Panels
Drag the vertical divider between the task list and the timeline chart to allocate more space to either side.
Filtering
- Click the filter icon in the toolbar.
- Select desired status, priority, or enter keywords.
- The timeline updates instantly to show matching tasks only.
Zoom Control
Use the Day / Week / Month buttons in the toolbar or the scroll-to-zoom gesture.
Task Display Rules
Date Handling
- Tasks with both a start date and a due date render as a bar spanning the range.
- Tasks with only a due date display as a single-day marker on that date.
- Tasks with no dates do not appear on the timeline canvas (they are still listed in the task list).
Bar Colors
- Default — uses the project's accent colour.
- Overdue — bar turns red when the due date has passed.
- Completed — bar is dimmed with a strikethrough label.
Visual Indicators
- Priority Badges — small icons on the left end of each bar.
- Today Line — a vertical dashed line marking the current date.
Integration with Other Views
- Task Details Panel — click any bar to open full task editing in the details panel.
- Grid View — changes made in the Grid View are reflected on the timeline instantly.
- Board View — status changes on the Board update bar colours in real time.
- Markdown Sync — all timeline edits are written back to Markdown files immediately.
Tips & Best Practices
- Always set both a start date and a due date for tasks you want to visualize on the timeline.
- Use the Week zoom as your default — it balances detail and context.
- Collapse parent tasks to get a high-level roadmap view.
- Combine timeline planning with the Dependency Graph to catch scheduling conflicts.
- Leverage the today indicator to quickly assess whether the project is on track.
- Resize bars carefully; the grid snaps to the nearest day boundary.
- Use filters to create focused views — e.g., show only "In Progress" tasks.
- Keep the task list panel visible for quick context while scrolling the timeline.
Timeline vs. Grid vs. Board
| Feature | Timeline | Grid | Board |
|---|---|---|---|
| Date visualization | Horizontal bars | Date columns | Due-date label |
| Drag to reschedule | Yes | No | No |
| Hierarchy | Collapsible tree | Collapsible tree | Flat cards |
| Best for | Scheduling & deadlines | Detailed data entry | Workflow & status tracking |
Troubleshooting
Tasks not showing on the timeline
Ensure the task has at least a due date set. Tasks without any dates are listed in the task list panel but do not render a bar on the canvas.
Bar positions look incorrect after editing Markdown manually
The timeline reads dates from the Markdown frontmatter. Verify that the date format follows YYYY-MM-DD. If the file was edited outside of VS Code, reopen the project to trigger a refresh.
Drag-and-drop not working
Check that you are dragging from the body of the bar (not the handles). Also ensure the file is not read-only.