Task Details Panel
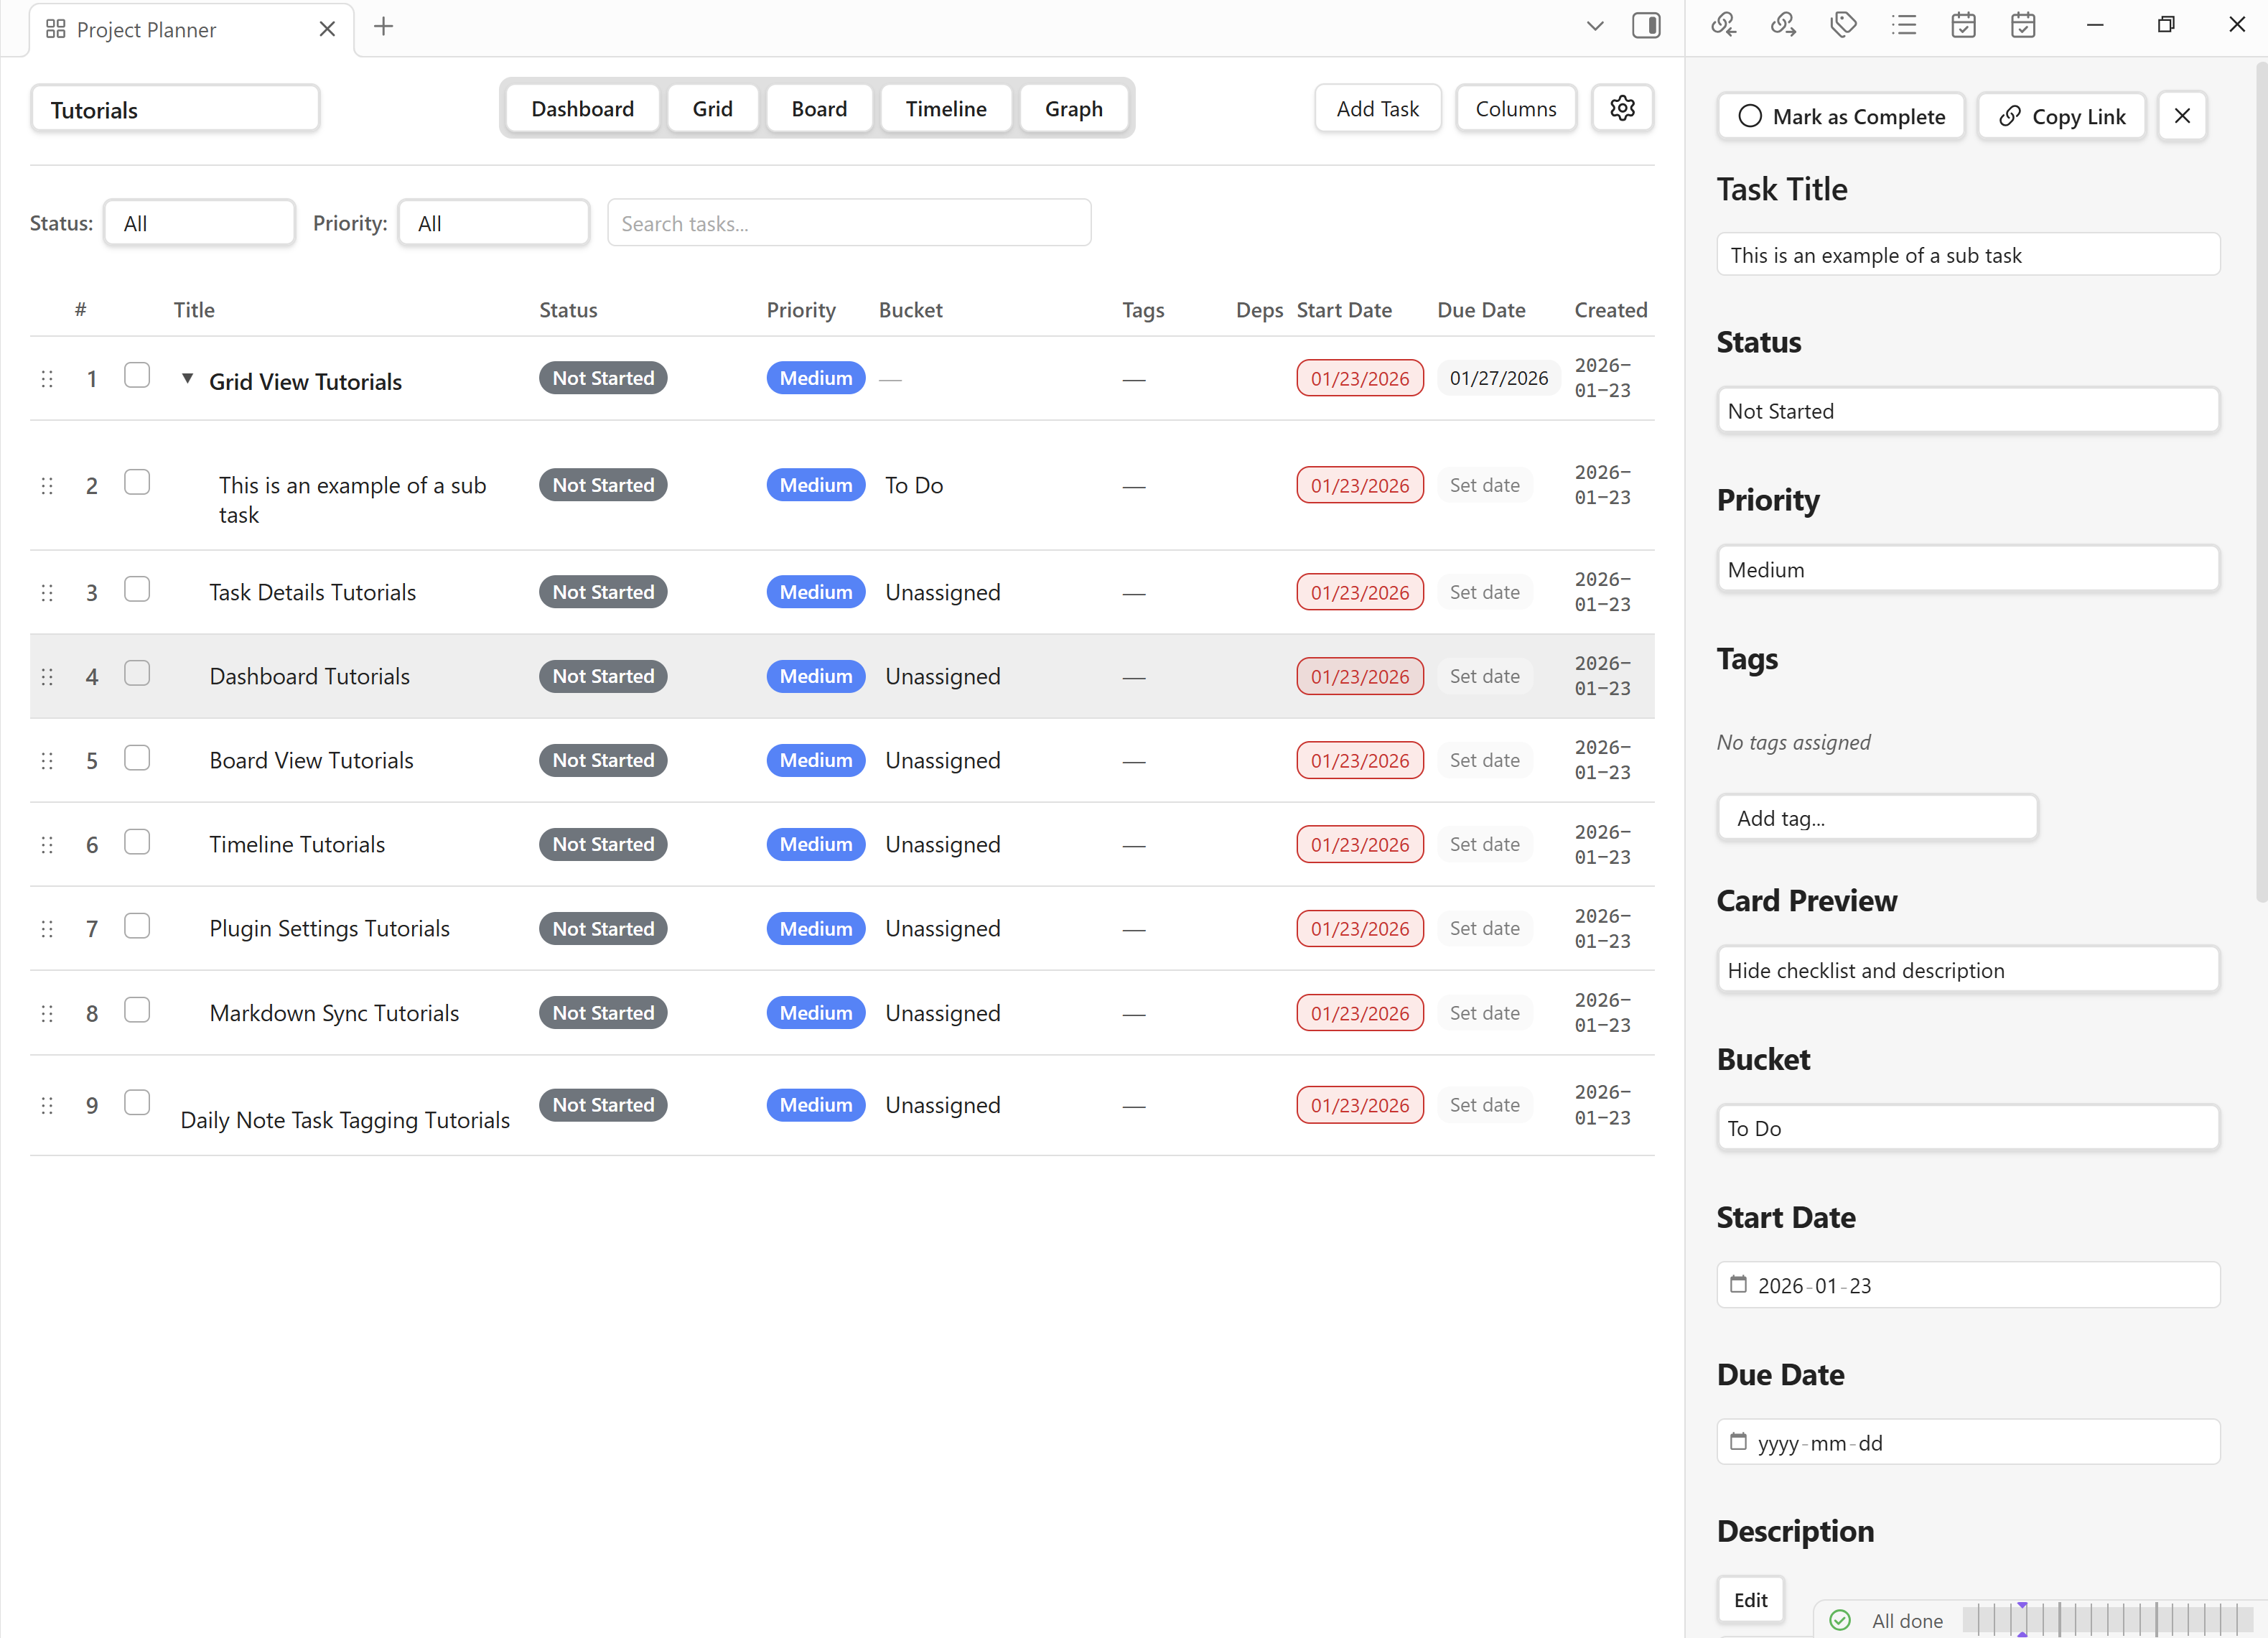
The Task Details Panel is a dedicated sidebar for viewing and editing every property of an individual task. It opens alongside any view and keeps your context intact while you make changes.
Overview
The panel provides a single place to manage all task metadata — title, status, priority, tags, bucket assignment, dates, Markdown description, dependencies, links, attachments, and checklists. Changes are saved instantly and synced to every other view in real time.
Features
Comprehensive Editor
- Title — editable text field at the top of the panel.
- Status — dropdown with project-defined statuses (e.g., Not Started, In Progress, Completed).
- Priority — dropdown selector (Critical, High, Medium, Low, None).
- Tags — add, remove, and create new tags with an auto-complete input.
- Bucket — assign the task to a bucket (reflects on the Board View).
- Start Date & Due Date — date pickers with optional time selection.
- Description — a rich Markdown editor with an edit/preview toggle.
- Dependencies — manage predecessor and successor relationships (FS, SS, FF, SF).
- Links & Attachments — add Obsidian-style internal links or external URLs.
- Checklist — a sortable list of subtask items with drag-to-reorder.
Quick Actions
- Complete Task — toggle the task's completed state with one click.
- Copy Task Link — copy a direct URI to the task for sharing or cross-referencing.
- Close Panel — dismiss the panel and return focus to the main view.
Tag Management
Tags are managed via an auto-complete input field. Start typing to see existing tags or type a new name and press Enter to create one. Click the × next to a tag to remove it from the task.
Bucket Assignment
Select a bucket from the dropdown to categorize the task on the Board View. If no bucket is selected, the task appears in the "Unassigned" column.
Date & Time Editing
Click the start-date or due-date field to open a date picker. Enable the time toggle to specify an exact time in addition to the date.
Markdown Description
The description field supports full Markdown syntax. Toggle between Edit and Preview modes using the button in the field header. In edit mode you write raw Markdown; in preview mode it is rendered as formatted HTML.
Tip: Use Markdown checklists (- [ ] item) inside the description for quick inline to-do lists that are separate from the main checklist feature.
Dependency Manager
The Dependencies section lists all predecessors and successors. Each dependency shows the related task name, the dependency type, and a remove button.
- Finish-to-Start (FS) — the default type.
- Start-to-Start (SS)
- Finish-to-Finish (FF)
- Start-to-Finish (SF)
Links & Attachments
- Obsidian Links — internal
[[wiki-link]]style references to other notes. - External Links — standard URLs (https://…) to external resources, documents, or websites.
Checklist
Add checklist items to break the task into smaller, trackable steps. Each item has a checkbox and supports drag-and-drop reordering.
Usage
Opening the Panel
- Click a task in any view — the panel slides open on the right.
- Or open the Command Palette and run "Project Planner: Open Task Details", then search for the task.
- Or follow a URI protocol link (
projectplanner://task/{id}) to open the panel directly.
Editing Properties
Title
Click the title text at the top of the panel, make your changes, and press Enter or click away to save.
Status
Click the status dropdown and select a new value. The change is saved immediately.
Priority
Click the priority dropdown and choose from Critical, High, Medium, Low, or None.
Tags
- Click the tags input field.
- Type to search existing tags or enter a new name.
- Press Enter to add the tag.
- Click × on a tag pill to remove it.
Bucket
Select a bucket from the dropdown list. Buckets are project-specific and match the columns in the Board View.
Dates
- Click the Start Date or Due Date field.
- Pick a date from the calendar popup.
- Optionally toggle the time selector and enter a specific time.
- Click outside the picker to confirm.
Description
- Click "Edit" to enter Markdown editing mode.
- Write or update the task description using Markdown syntax.
- Click "Preview" to see the rendered output.
Managing Dependencies
- Scroll to the Dependencies section.
- Click "+ Add Dependency".
- Search for and select the related task.
- Choose the dependency type (FS, SS, FF, or SF).
- To remove, click the × button next to the dependency.
Note: Dependencies added here are immediately reflected in the Dependency Graph View and in any dependency columns in the Grid View.
Managing Links
Obsidian Links
- In the Links section click "+ Add Link".
- Choose "Obsidian Link".
- Enter the note name (e.g.,
[[Meeting Notes]]). - Press Enter to save.
External Links
- Click "+ Add Link" → "External URL".
- Paste the URL.
- Optionally enter a display title.
- Press Enter to save.
Managing Checklist
- Scroll to the Checklist section.
- Click "+ Add Item" and type the checklist entry.
- Click the checkbox to mark an item complete.
- Drag items to reorder them.
- Click the × button to delete an item.
Completing a Task
Click the "Complete" button (or check the task's checkbox) at the top of the panel. The task status changes to "Completed" and the panel reflects the updated state.
Copying a Task Link
Click the "Copy Link" button to copy the task's unique URI to your clipboard. The format is:
projectplanner://task/{task-id}Paste this link anywhere — in another note, a chat message, or a browser — to open the task directly.
Integration with Other Views
- Grid View — opening a task from the Grid displays the panel alongside the table.
- Board View — clicking a card on the Board opens the panel.
- Timeline View — clicking a bar on the Timeline opens the panel.
- Dependency Graph — double-clicking a node in the Graph opens the panel.
- Markdown Sync — every edit in the panel is written to the Markdown source immediately.
Tips & Best Practices
- Use the description field for meeting notes, acceptance criteria, or any long-form context.
- Keep tags consistent across the project — use the auto-complete to avoid duplicates.
- Assign a bucket early so the task appears in the correct Board column from the start.
- Set both start and due dates to get the most value from the Timeline View.
- Use the checklist for multi-step tasks instead of creating many tiny subtasks.
- Copy the task link when referencing tasks in external tools or documentation.
- Review dependencies periodically — remove any that are no longer relevant.
- Toggle to preview mode to verify your Markdown description renders correctly.
- Use the keyboard shortcut to open the panel quickly without reaching for the mouse.
- Close the panel when you're done to reclaim screen space for the main view.
Troubleshooting
Panel doesn't open when clicking a task
Ensure the Task Details Panel is not disabled in your settings. Go to Settings → Views → Task Details and verify it is enabled.
Changes are not saving
Check that the underlying Markdown file is not read-only or locked by another process. Also confirm you have write permissions to the project folder.
Tags or buckets are missing from dropdowns
Tags and buckets are project-scoped. Make sure you are viewing the correct project. If you recently renamed a tag or bucket, close and reopen the panel to refresh the list.
Dependency search returns no results
The search only includes tasks in the same project. Cross-project dependencies are not currently supported.