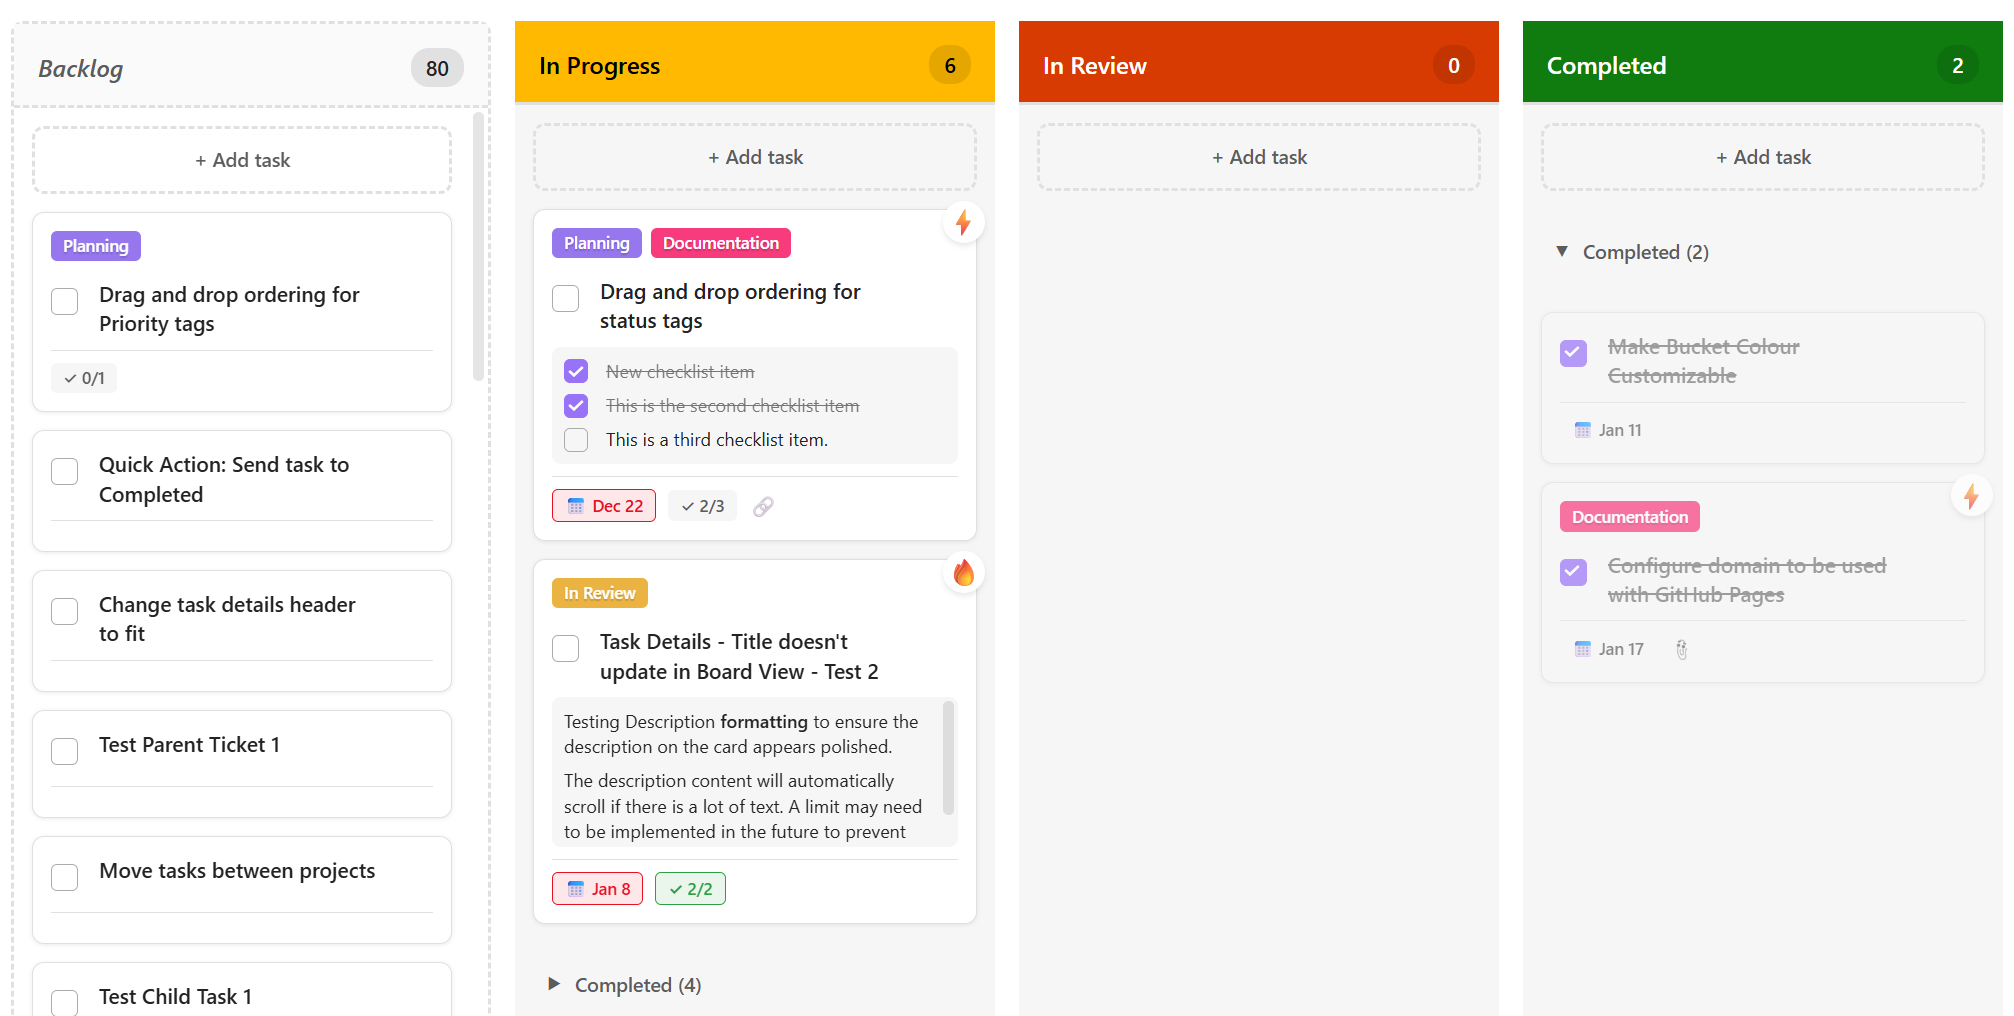
Board View (Kanban)
The Board View offers a Microsoft Planner-style kanban interface. Tasks are displayed as cards organized into custom buckets, and you can move them with simple drag-and-drop interactions.
Overview
- Drag-and-Drop Interface — move task cards between buckets effortlessly.
- Custom Buckets — create, rename, reorder, and delete columns per project.
- Rich Task Cards — see priority, tags, status, dates, and progress at a glance.
- Active & Completed Sections — completed tasks are separated automatically.
Buckets
Buckets are the vertical columns on the board. Each project has its own set of buckets, so you can tailor the board layout to every workflow.
Key Behaviors
- Per-Project Configuration — each project maintains its own bucket list.
- Drag to Reorder — grab a bucket header to move it left or right.
- Add / Rename / Delete — use the bucket header menu ("…") for all management actions.
- Default Buckets — new projects start with sensible defaults (e.g., "To Do", "In Progress", "Done").
- "Unassigned" Bucket — tasks that haven't been assigned to a bucket appear here.
- Active & Completed Sections — within each bucket, completed tasks collapse into a separate section at the bottom.
Important — Bucket vs. Status: A bucket is a visual grouping on the board, while status (e.g., "Not Started", "In Progress", "Completed") is a task property. Moving a card between buckets changes its bucket assignment, not its status. Update status independently via the card's context menu or the Task Details Panel.
Task Cards
Each card on the board surfaces the most important task information:
- Title — the task name, clickable to open details.
- Priority Badge — color-coded indicator (Critical, High, Medium, Low, None).
- Tags — small labels for categorization.
- Status — current workflow state.
- Due Date — with overdue highlighting when applicable.
- Subtask Progress — a mini progress bar showing completed vs. total subtasks.
- Dependencies — an icon indicates when dependencies exist.
- Attachments — paperclip icon if links or attachments are present.
- Checkbox — quickly mark the task complete.
- Context Menu — right-click for actions like edit, move, delete.
Managing Tasks
Create
- Click "+ Add Task" in the board header to add a task to the default bucket, or
- Click "+ Add" at the bottom of a specific bucket to add a task directly to it.
- Enter a title and press Enter.
Move
Drag a card from one bucket and drop it into another. The card's bucket property is updated automatically.
Complete
Click the checkbox on any card to toggle its completed status. Completed cards move to the "Completed" section of their bucket.
Edit
Click the task title to open the Task Details Panel for full editing.
Delete
Right-click the card and select "Delete task". A confirmation prompt appears before the task is permanently removed.
Managing Buckets
- Add a Bucket — click "+ Add Bucket" at the far right of the board.
- Rename — click the "…" menu on the bucket header and select "Rename".
- Reorder — drag the bucket header left or right.
- Delete — click "…" → "Delete bucket". Tasks in the bucket are moved to "Unassigned".
Warning: Deleting a bucket does not delete its tasks. They are automatically reassigned to the "Unassigned" bucket.
Customization Tips
- Workflows — mirror your team's workflow stages with custom buckets (e.g., "Backlog → Sprint → Review → Done").
- Combine Status & Buckets — use buckets for categories and status for progress.
- Completed Sections — keep focus on active work; expand the completed section only when needed.
- Tags — add tags to group related cards visually across different buckets.
- Due Dates — leverage overdue highlighting to spot at-risk tasks quickly.
- Subtasks — break large tasks into subtasks and monitor progress from the card.
Tips & Best Practices
- Limit the number of buckets to 5–7 to keep the board scannable.
- Use WIP (work-in-progress) limits mentally — avoid piling too many cards in one bucket.
- Review the board daily; drag cards to reflect the latest status.
- Archive or delete completed tasks periodically to keep the board clean.
- Combine the Board View with the Timeline View for both visual and temporal perspectives.
- Use colour-coded priority badges to draw attention to high-priority work.
- Right-click cards to access quick actions instead of opening the details panel every time.